
Help : Admin : Events : Create a new event
Go your club administration area (Read about how to Get to your Administration area)
Click on ‘Events & Sessions’ to see your event calendar.
Creating a brand new event
We recommend that you copy existing events where possible. This preserves existing passes. You can achieve the same thing by creating a brand new event but it might take longer!
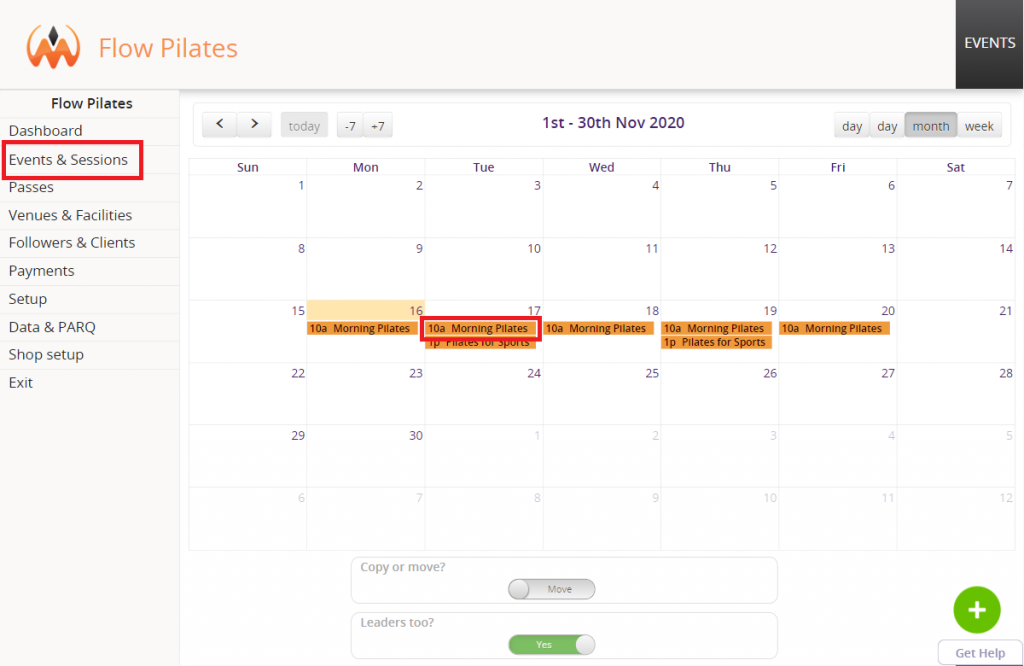
Create an event by going to the Day view (Day button on top right of the calendar) and clicking the appropriate time. You will then be taken to the following form.
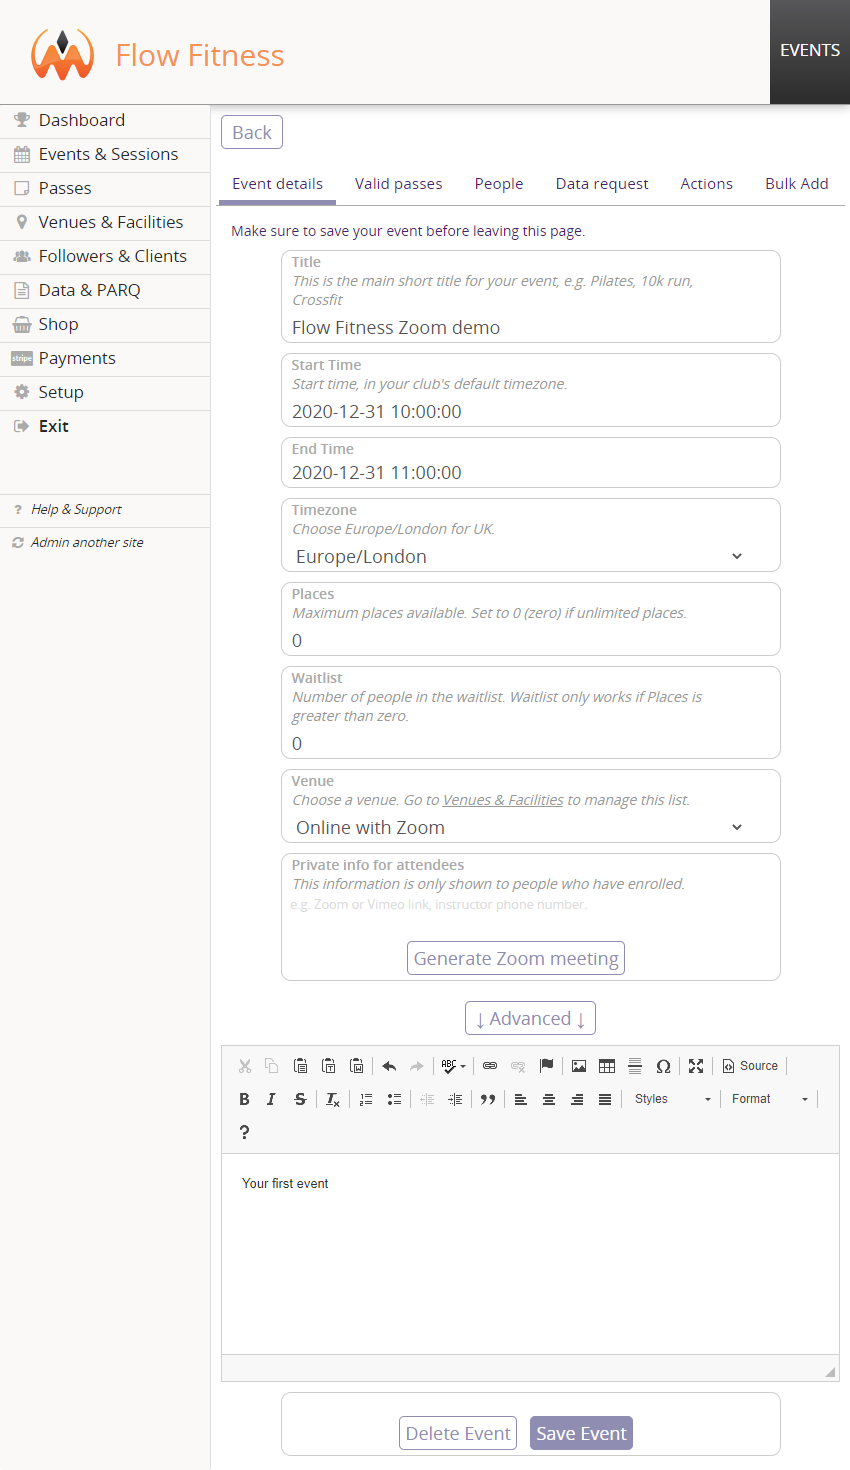
- The title of your event. Keep it short!
- The start time. You can edit this date, make sure to stick to the correct format (2016/12/04 16:45:00)
- The end time
- The number of points earned. Points can be used for loyalty bonuses, etc., and are available as a high score.
- The maximum number of attendees for the event. This does not include leaders. Leave at 0 if there’s no limit to attendees.
- If there’s a place limit, you can also run a waitlist. Anyone who signs up to the waitlist will get an automatic email if a space becomes available, or their pass refunded if not.
- The activity. This is a standard central list of activities; choose the most appropriate.
- The venue. Choose from one of your venues (Read about Venues)
- Private Info – this is only available to people who’ve enrolled for the events, and is emailed to them on signup.
- Advanced – Featured – Also put the event at the top of your calendar and highlight it. Ideal for workshops. You can also add a Schedule layout to your website which only shows Featured events.
- Advanced – Video – This event is a pre-recorded class. Insert a Vimeo private link in the Private Info box and it will appear in your Video layout to sell as a pre-recorded class.
- Advanced – Activity – Indicate the type of activity from a list. This does not need to be set.
- Advanced – Points – You can give customers points for signing up to events. This does not need to be set.
- Advanced – Associated – This is only used for accounting purposes if other sites are using this event. Does not need to be set.
- Description – Add some friendly, welcoming text about what your customers should expect from the class, and if they need to bring anything along.
Click Create Event for a new event, or Save Event for an existing one. Messages will tell you if successful or if anything needs changing.
If you’ve created a new event, you’ll be jumped to the Valid Passes section to add a pass. Nobody can come to your event unless you add a pass!
Adding (and removing) passes
Passes let people attend events. Passes can be free, be valid for one session, or multiple sessions. (Read about Passes)
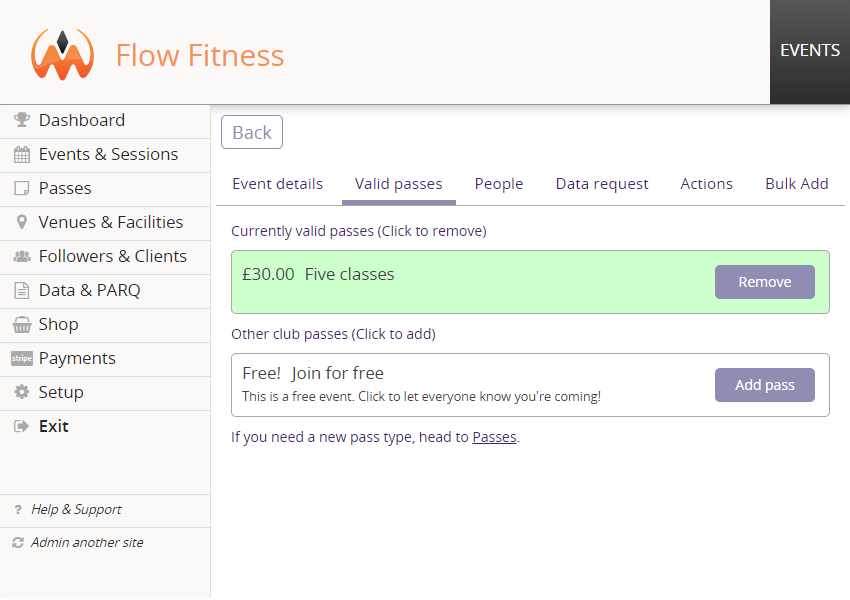
Scroll down to ‘Valid Passes’ – you’ll see a list of passes. The ‘Join for Free!’ pass is always available. If you want people to be able to sign in for free, click this pass. It will jump to the ‘Passes in use’ area.
To add paying passes, please see the Passes page.