
Help : Admin : Events : Add and remove attendees
As an administrator you can add and remove people from your events. This guide shows you how to complete the most common steps.
You can complete this activity from either the Admin area or the customer view of an event. This guide shows you how to do it from the Admin area.
Manage enrollments from the Admin area
1. Click here to see how to Get to my administration area
2. Click on ‘Events & Sessions’ to see the calendar. Navigate to the event, using the month, week, day or list views. Click on the event you wish to manage. A popup box will appear – click ‘Edit event’.
3. Click ‘People’ to view and edit enrollments.
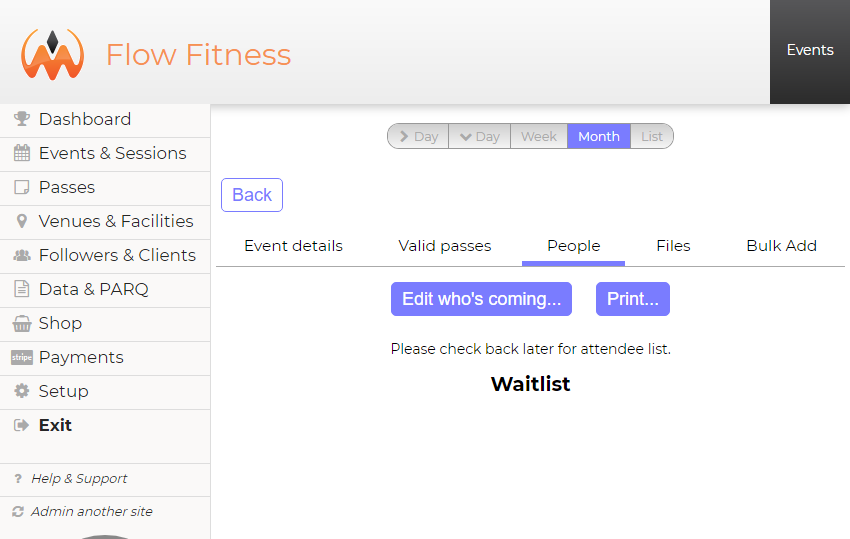
If nobody is enrolled, the you’ll see the above view. (‘Print…’ is used to provide an easy list of the people coming to the event.) Otherwise you’ll see a list of enrolled people.
Note what’s shown around the person’s name. A green border means this person is attending. An orange pass symbol means they’ve used a pass to sign in. A small eye symbol means they’ve been seen/checked in to the event (not all clubs use this feature.)
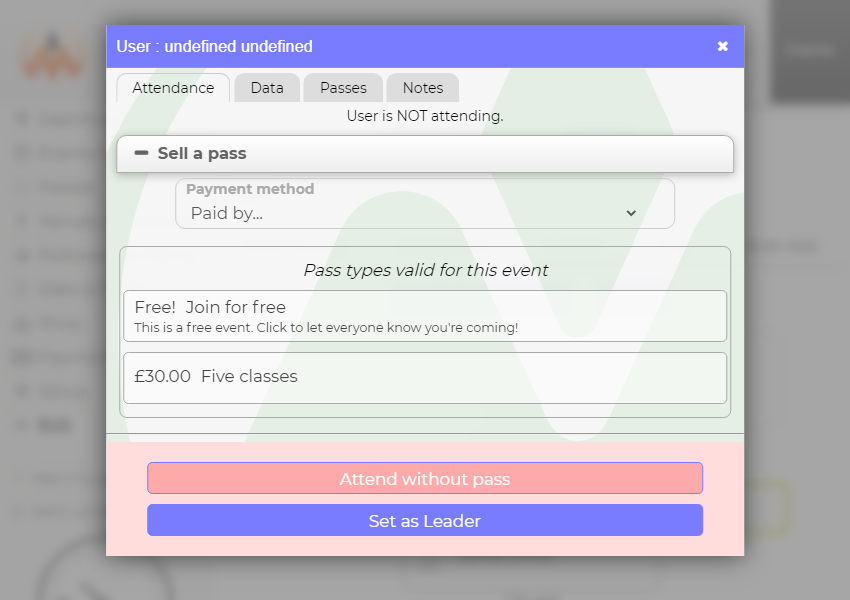
4. Click ‘Edit who’s coming…’. You’ll see a list of everyone registered on your site. Use the search to find the person of interest, and click their name. This will popup a box with a list of passes that you might want to use to enroll the customer.
* If you can’t find a person, you may need to add them. Read about how to Add a new person to an event. *
Add an attendee
You can enroll a customer either before or after an event starts. It’s a good idea to encourage attendees to book themselves in before an event starts – it saves you time!
You have three ways to enroll a customer.
- The attendee hasn’t got a pass and isn’t able to buy one at the time. Click ‘Attend without pass’ and the attendee will be added. (This is not recommended but may be necessary for clubs that allow members to ‘owe’ for events they’ve been to.) The attendee will be sent an email reminding them to buy a pass for this event.
- The attendee has a usable pass. Click the pass (it will be shown under ‘Passes with credit’) and the attendee will be added. The attendee will be sent a confirmation email.
- The attendee wishes to buy a pass. Choose a new pass and choose how the customer has paid. The attendee will be added and a receipt emailed to them. You will see passes that are valid for the event; you can also use passes that are not valid for the event (if for example you wish to use other credit owned by the customer).
Removing an attendee from an event
- Select the attendee
- Click the ‘Remove from event’ button
- The attendee will be sent a cancellation email.